Customer Segmentation Management
- What is Customer Segmentation?
- How do I customize Customer Segmentation?
- How do I create new Segments and edit Segment Pages?
- How do I condition the segments?
- How do I check segmented customers?
Customer Segmentation is a tool for segmenting customers according to their sales history, buying behavior, and other personal details.
What is Customer Segmentation?
The Customer Segmentation module presents a tool to draw various segments of customers according to a number of customized rules and conditions. With the feature you are able to:
- Segment both registered and guest customers;
- Customize rules and conditions for segmentation against a variety of parameters;
- Use customers purchase track records, personal details, and other information as parameters for segmentation;
- Integrate the module with the native Magento Newsletter and Cart Price Rules;
- Move segments to groups;
- Export segmented data to CSV or XML.
How do I customize Customer Segmentation?
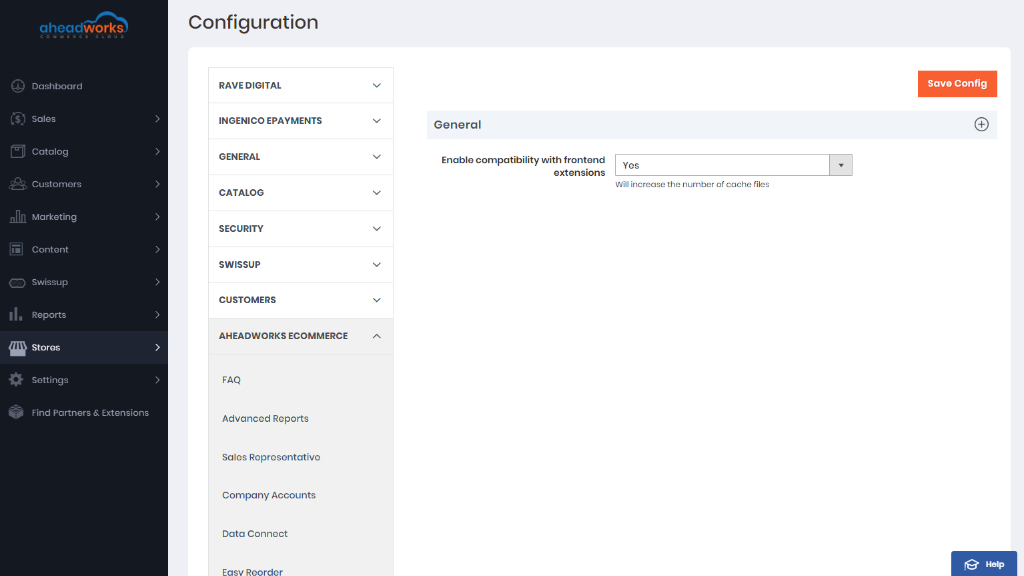
To start work with the Customer Segmentation you need to enable the module and go to Stores > Settings > Configuration > Aheadworks ecommerce > Customer Segmentation.
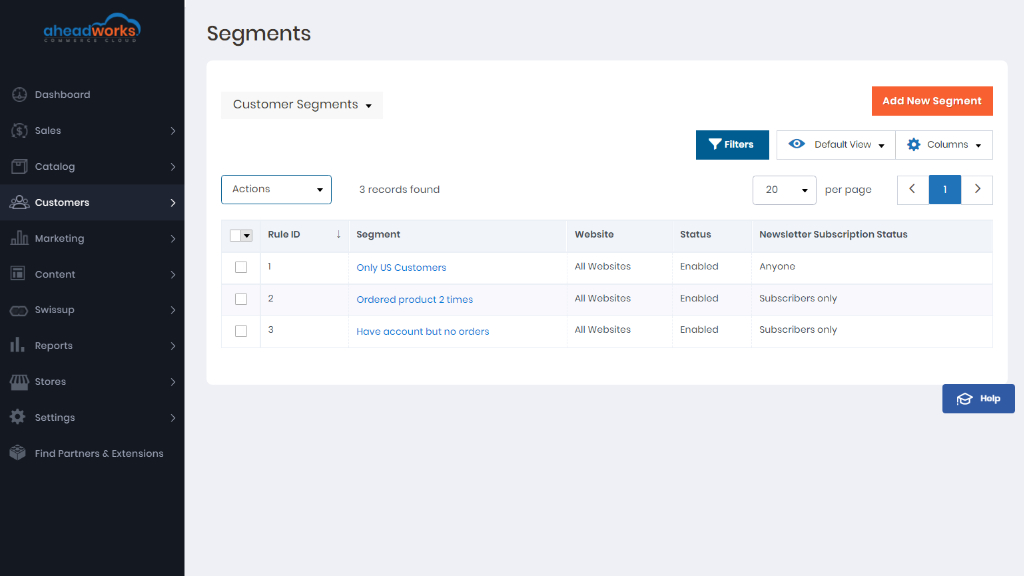
Next, go to Customers > Customer Segmentation by Aheadworks > Customer Segmentation.
This is where you may view, edit the segments as well as add new ones. The segments are allocated into a table with five columns Rule ID, Segment, Website, Status, and Newsletter Subscription Status, which represent some most important segments settings details. The table is easily customizable and searchable with the 'Columns', 'Default View', and 'Filters' active elements on the top right of the page.
You may enable, disable or delete available segments individually or in bulk. Tick the boxes next to the chosen segments on the left of the table, click the 'Actions' folding list and opt for an operation.
To edit a segment click the active link of the segment name, to add a new segment click the 'Add New Segment' button on the top right of the page. These operations will take you to the Edit/New Segment page.
How do I create new Segments and edit Segment Pages?
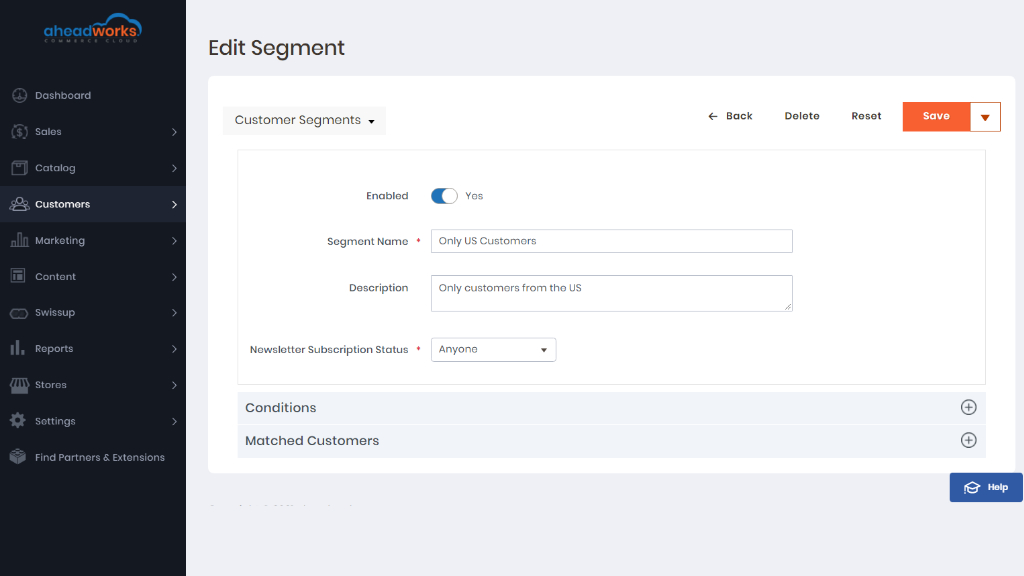
The New Segment and Edit Segment pages look identical, the name suggests the operation you are to do with the segment. This is where you may alter or add all the details of the segment, define rules for segmentation, and lookup for matched customers.
Basic details you are suggested to provide for each segment:
- Status - enable or disable the segment here;
- Segment Name - provide a name for the segment;
- Description - give details on the segment;
- Newsletter Subscription Status - opt for a subscription status of customers who fall under the segment.
After configuring general settings click on the Save button. Next, you will have to configure additional options:
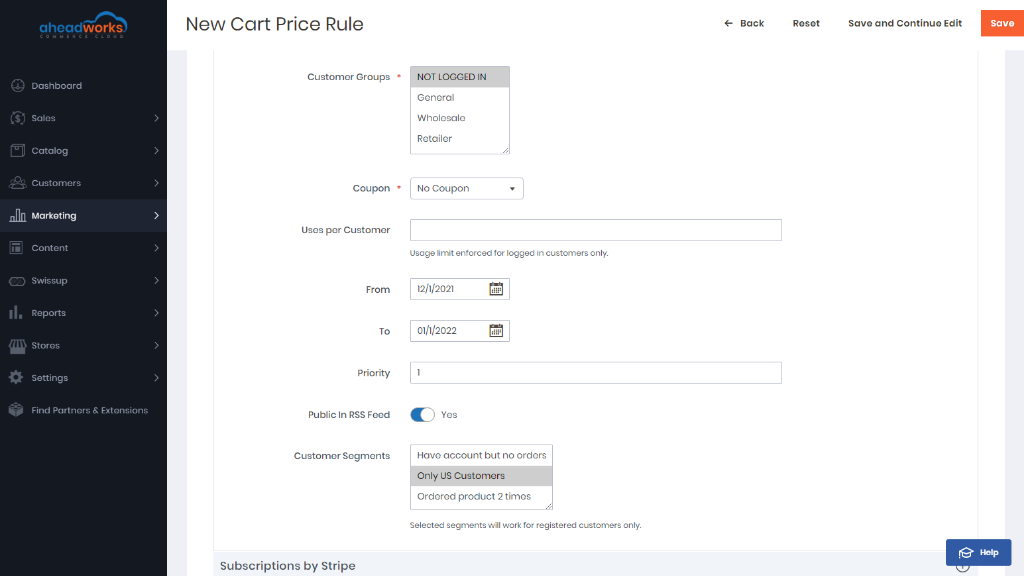
- Customer Group - define which group to assign rule;
- Coupon - define will be created or not coupon code;
- Uses per Customer - define usage limit enforced for logged in customers only;
- From/To - define dates when the rule is enabled;
- Priority - define the priority of the rule;
- Public in RSS Feed - enable/disable public in RSS feed;
- Customer Segments - assign the segment for registered customers.
|
The extension will reindex all enabled segments daily, so it is recommended to disable the unused ones to save time on reindexing. |
Prior settings of the segment sorted, you may now proceed to the Conditions block of the segment.
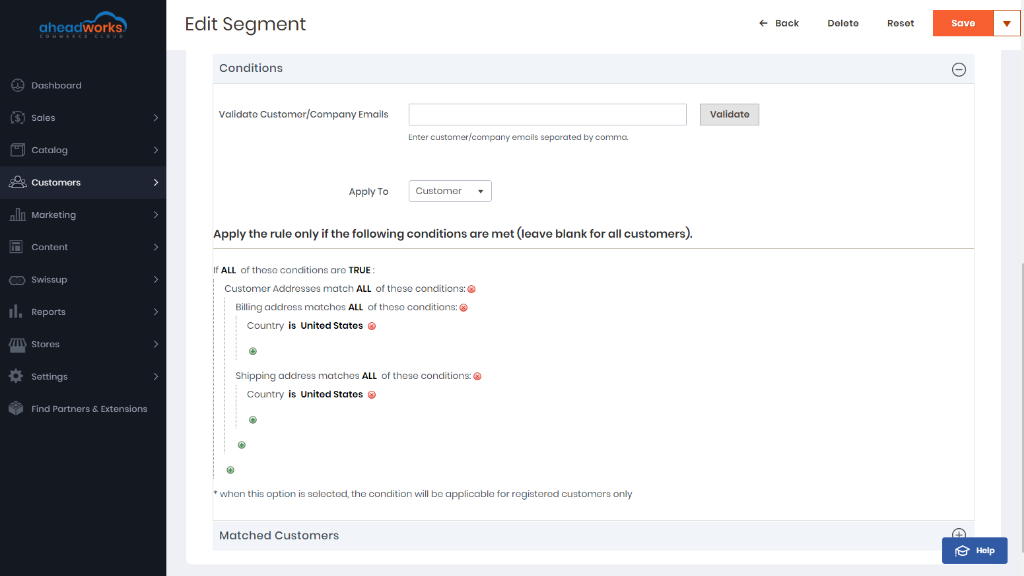
How do I condition the segments?
The Conditions block of the Edit/New Segment page allows:
- Validating Customer Emails - enter the emails of the customers you think to fall under segmentation for quick and fast check thereof
- Customizing rules for segmentation - condition the rules for segmentation
|
Unlike building a whole segment, the Validating Customer Emails option doesn't require reindexing, so it is a good option to verify whether the rule you have created is correct. |
To add conditions for segmentation click on the Add button and choose an attribute for conditioning. For further configuration proceed to the 'ALL', 'TRUE', 'IS', '...' and other clickable parameters to alter them in accordance with your rule.
Pay attention to the limitations of Bundle Product type: the module doesn't look for the attribute values in children products of a bundle, so if you need to find customers who purchased a bundle product, it is recommended to create conditions "SKU is/is not/contains/doesn't contain".
|
From a performance perspective, it is recommended to put date conditions on a level as high as possible. |
When the rule is set, proceed to one of the following:
- New segment - click the 'Save' button and reindex the rule.
- Edit segment - click the 'Save' button, reindex the rule, and refresh the page.
- Delete a condition click on the Delete (red cross) button.
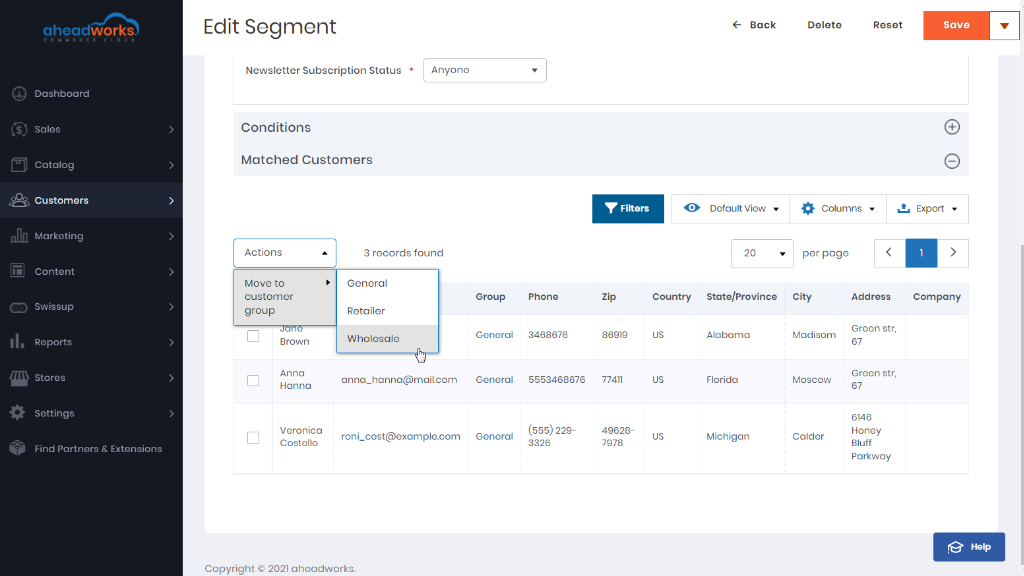
Once the rule is set, saved, and reindexed, you will be able to check the customers who match the segmentation, move them to groups or export to CSV.
How do I check segmented customers?
After reindexing is done, scroll down the Edit/New Segment page to the 'Matched Customers' block to check the customers who match the segmentation. The list comes as a table with the following columns, the names of which speak for their content: Name, Email, Group, Country, Phone, Zip, State, City, and Address. You may customize the view of the table to the 'Columns', 'Default View', and 'Filters' active elements on the top right of the page.
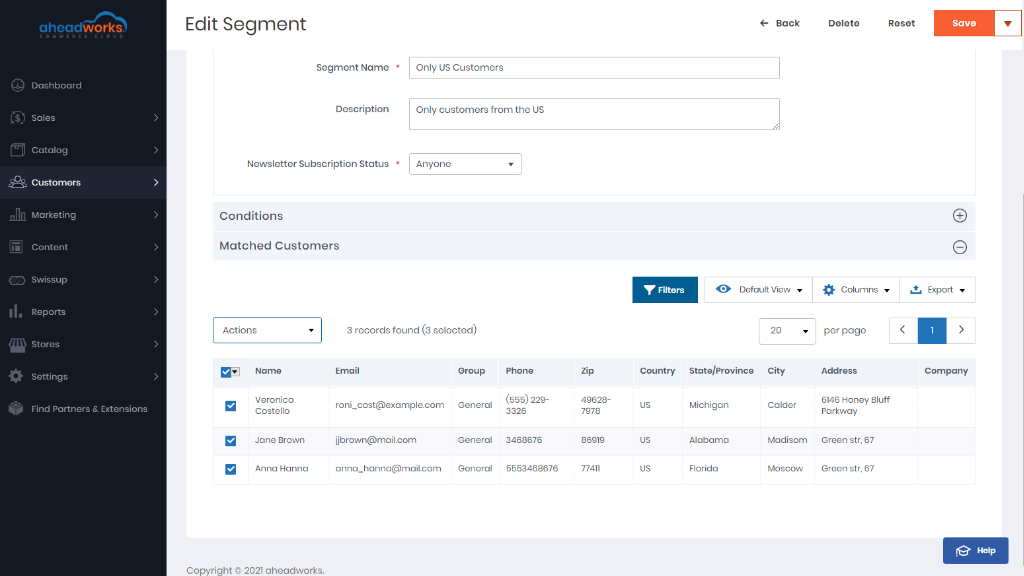
To export the segment click 'Export' and choose the format of the file: CSV or XML.
To move the segment to a group select the customer entries, click 'Actions', and then 'Move to customer group'. A list of groups available will pop up, where you will be able to finalize the operation.