Popup Pro
- What is the Popup Pro Module?
- What are the Business Advantages of the Popup Pro Module?
- How Do I Set up the Module?
- How Do I Manage Popups?
- How Can I Create Popup Content and Popup Design?
What is the Popup Pro Module?
By far, when used properly popups may well help soar your conversion rates and add to customers' engagement with the store. Popup Pro helps build sustainable promo strategies and supports them with popup notifications. It is for you to decide upon the time, rules of display, audience, format and frequency of the popup, and it is for the module to offer all the relevant functionality to have them work. Furthermore, the module allows analyzing each popup against some performance criteria.
What are the Business Advantages of the Popup Pro Module?
The Popup Pro module provides merchants with the following key features:
- Display popups on the catalog and product pages, at shopping cart and checkout
- Make popups visible with 7 animation effects and 9 predefined positions on a page
- Trigger popups upon a set period after the page load, exit intent, % of page scrolling, or the number of pages viewed
- Control the number of popup displays per customer
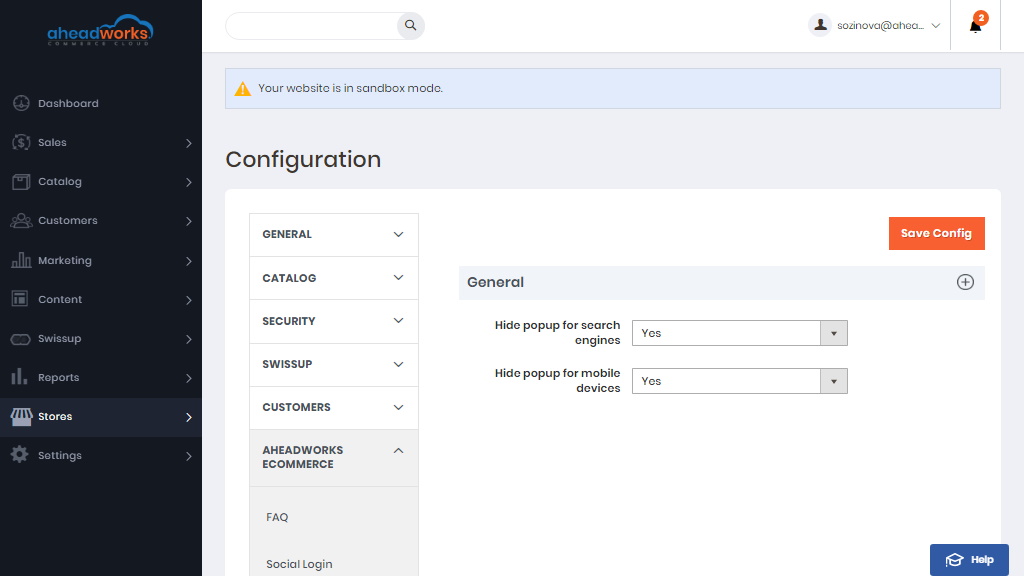
How Do I Set up the Module?
First please go to Stores > Settings > Configuration > Aheadworks Ecommerce > Popup pro.
Here you can enable to Hide popup for search engines and for mobile devices. By default, these configurations are set to No.
Once installed the module introduces its section under Content > Popup Pro by Aheadworks > Manage Popups
The Manage Popups screen is the management center of the module. The popup grid offers an overview of all the popups created along with the Click Through Rate (CTR) statistics:
- Views - how many times the popup has been displayed to the customers;
- Clicks - how many times customers clicked the popup contents;
- CTR - views to clicks ratio.
The Manage Popups grid can be adjusted according to a particular task:
- Columns button allows enabling/disabling the grid columns that may be considered relevant or excessive for the current task;
- Filter button allows sorting popups created according to the relevant attributes (event, position, status, etc.);
- Default view button allows saving the current grid look for quick access.
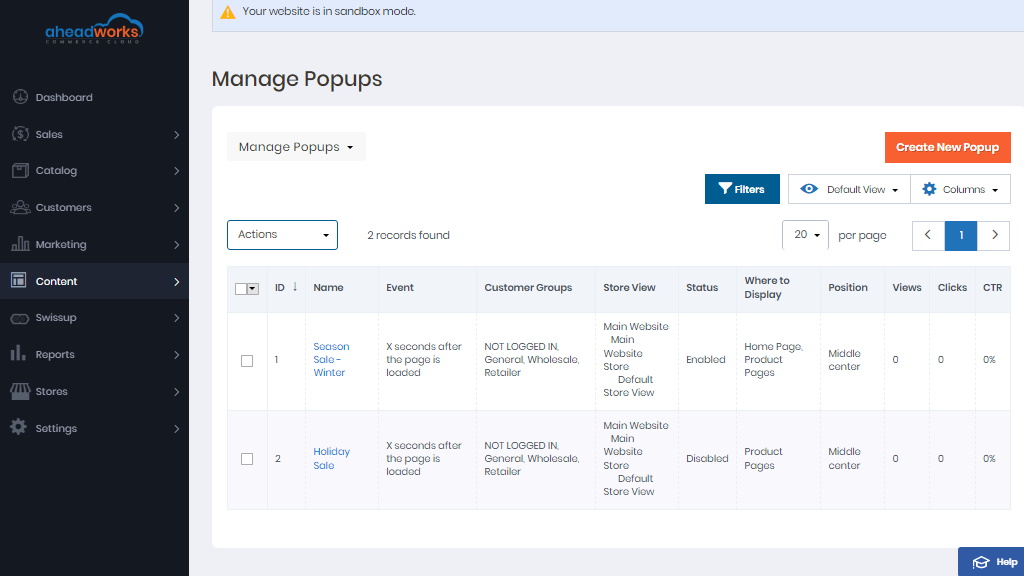
Once the Manage Popups grid is configured, the store administrator may start managing popups.
How Do I Manage Popups?
To create a new popup, click on the Create New Popup button.
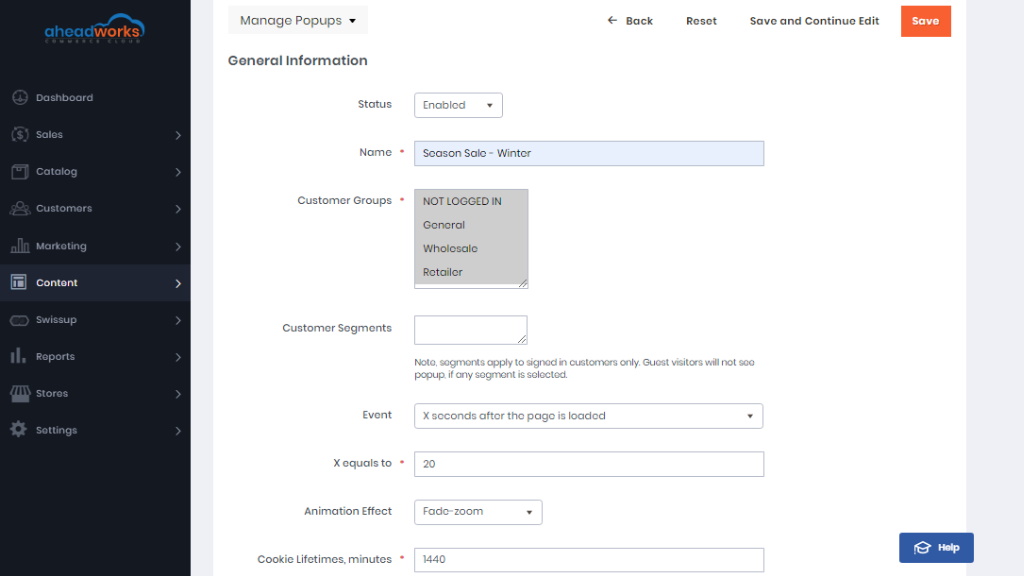
General Information
In this section the store administrator is to suggest a name for the popup, a store view for popup display, as well as some other popup attributes.
The General Information section of the New Popup page comes with the following settings:
- Status - allows enabling/disabling the popup;
- Name - name of the popup for identification purposes (not visible by customers);
- Customer Groups - allows defining customer groups the popup should be displayed to;
- Customer Segments - allows defining customer segments to see the popup;
- Event - allows selecting an event to display a popup:
- Immediately after the page is loaded (not recommended);
- X seconds after the page is loaded;
- Once the page is scrolled by X%;
- Once customer viewed X pages;
- Once cursor is moved outside the page.
- X equals to - specifies the value for the X parameter of the event;
- Animation Effect - allows selecting an effect the popup will be displayed with:
- Fade-zoom;
- Fade-slide;
- Newspaper;
- Horizontal move;
- Move from top;
- 3d unfold;
- Zoom-out.
- Cookie Lifetimes, minutes - Defines a value for iteration of popup display.
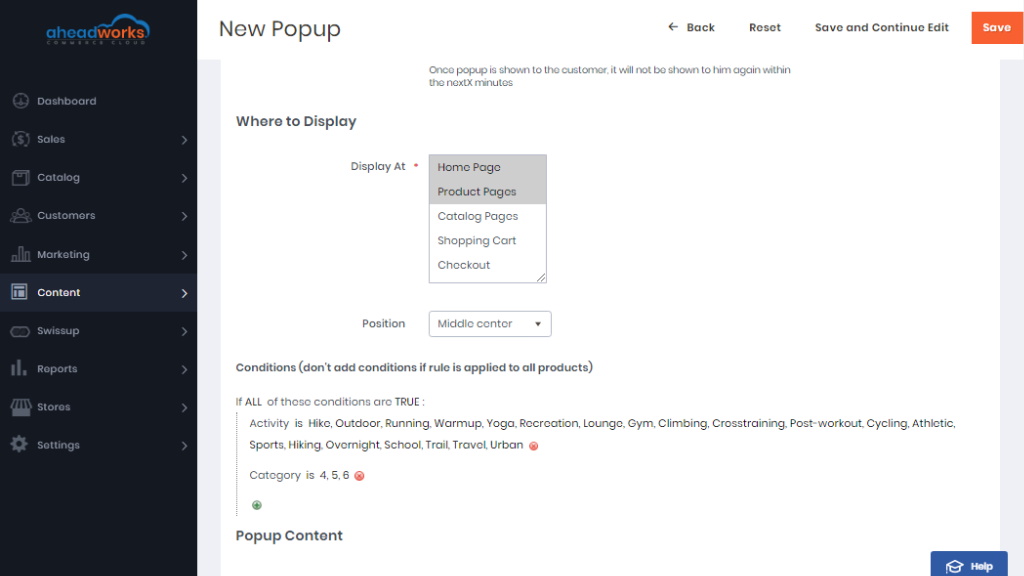
Where to display
This is the second popup configuration section. Here store administrator is suggested to decide on what pages the popup is to be displayed.
The section comes with the following settings:
- Display At - allows defining on what page the popup is to be displayed:
- Home Page;
- Product Pages;
- Catalog Pages;
- Shopping Cart;
- Checkout.
- Position - allows defining the position of the popup on the page:
- Top left/center/right;
- Middle left/center/right;
- Bottom left/center/right;
- Conditions - a set of native Magento conditions controlling the whereabouts of the popup at the store.
|
To set the conditions, click the text in bold 'ALL', 'TRUE' or '...'. A dropbox with appear suggesting a list of conditions. To add a condition, click '+', to erase - 'x'. |
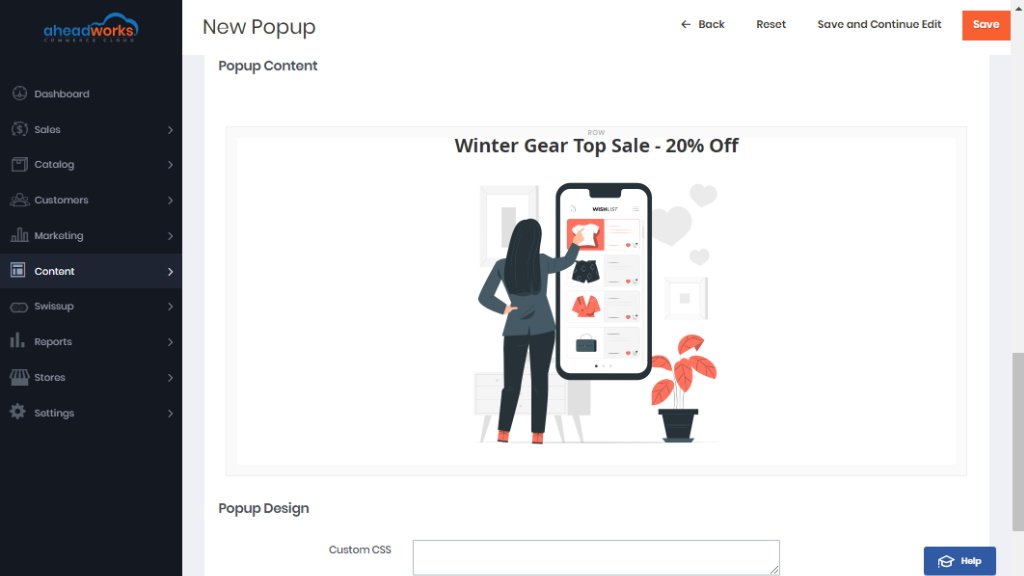
How Can I Create Popup Content and Popup Design?
The next section of the New Popup page is the content section.
Here the store administrator is presented with the WYSIWYG editor, as well as with some content blocks of the popup. The editor allows populating the popup with widgets, media (images, video), hyperlinks etc.
The final section of the New Popup page. Here store administrators can submit a custom CSS design to adjust the look and feel of the popup. If the field is empty the default design is used.