Returning Management
- What is the RMA Module?
- How Do I Set up the RMA Module?
- How Do I Create Returns from the Backend?
- How Do I Manage RMA Requests?
- How Can Customers Create Return Requests?
- How Do I Improve Orders?
What is the RMA Module?
RMA (return merchandise authorization) completely arranges the return merchandise process in web stores. Customers can create return requests and monitor them from their accounts. Store admins can arrange requests from the backend by adding custom fields to an RMA request form, communicating with customers in the dedicated chat area, and sending email alerts and custom canned responses while requests are processed.
How Do I Set up the RMA Module?
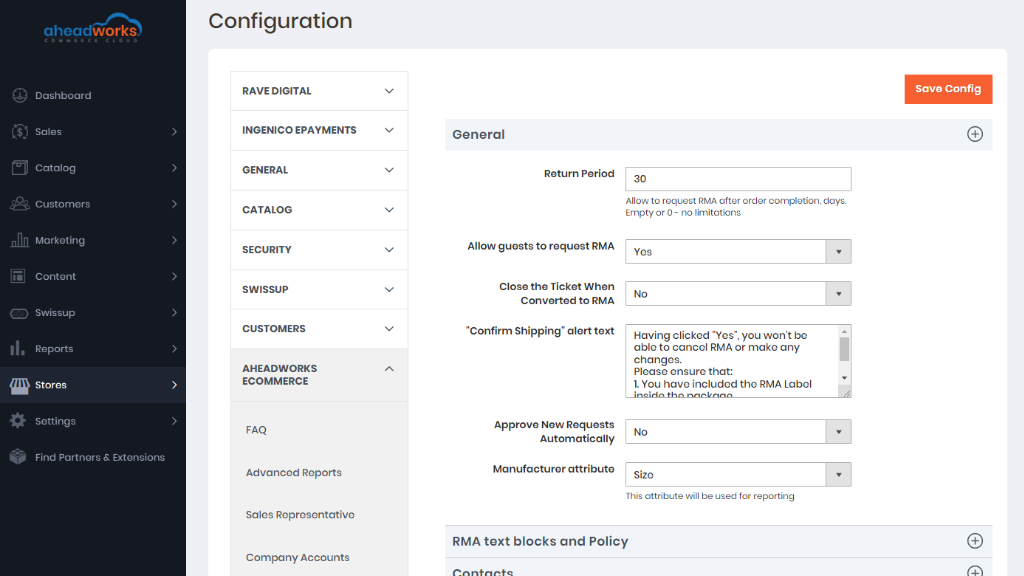
To set up the RMA module follow Stores > Settings > Configurations > Aheadworks Ecommerce > RMA.
General section
- Return Period - defines how many days after placing the order the customer can ask for the return;
- Allow guests to request RMA - defines if guest customers can ask for the refund (email and order ID are required);
- Close the Ticket When Converted to RMA -
- "Confirm Shipping" alert text - edits the 'Confirm Shipping' pop-up notification;
- Approve New Requests Automatically - defines if the incoming return requests should be approved automatically
- Manufacturer attribute - this attribute is used for reporting.
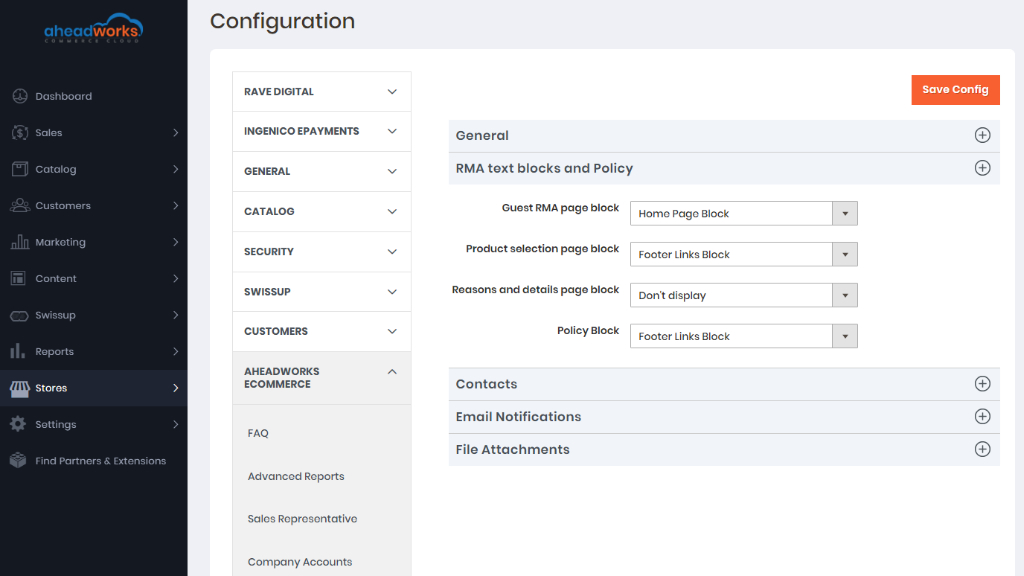
RMA text blocks and policy
This setting section displays CMS blocks at the specific RMA request steps. Every field represents the corresponding step with the box of all CMS blocks available in the store.
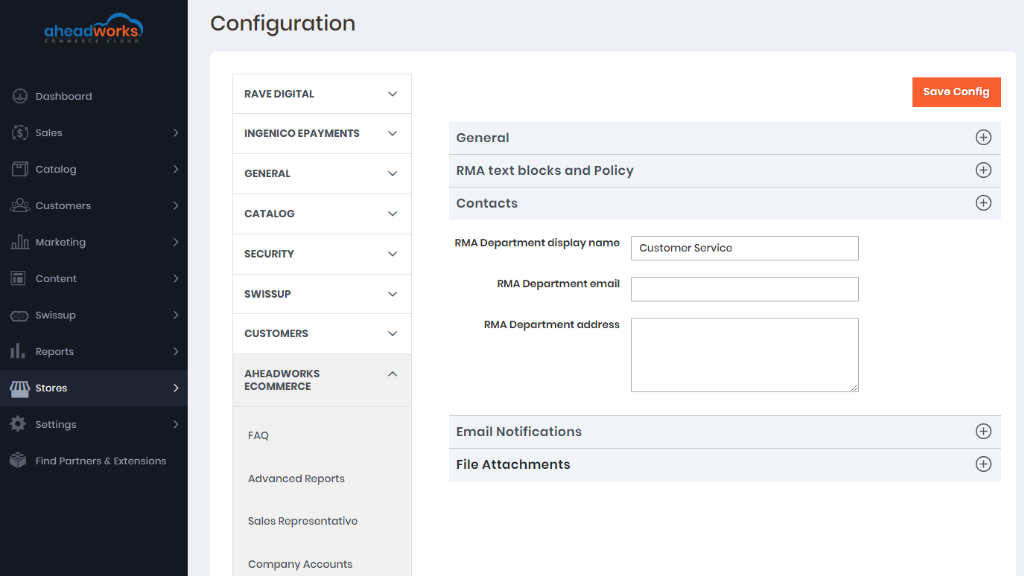
Contacts
This setting section defines your RMA department credentials such as the name displayed, email, and address.
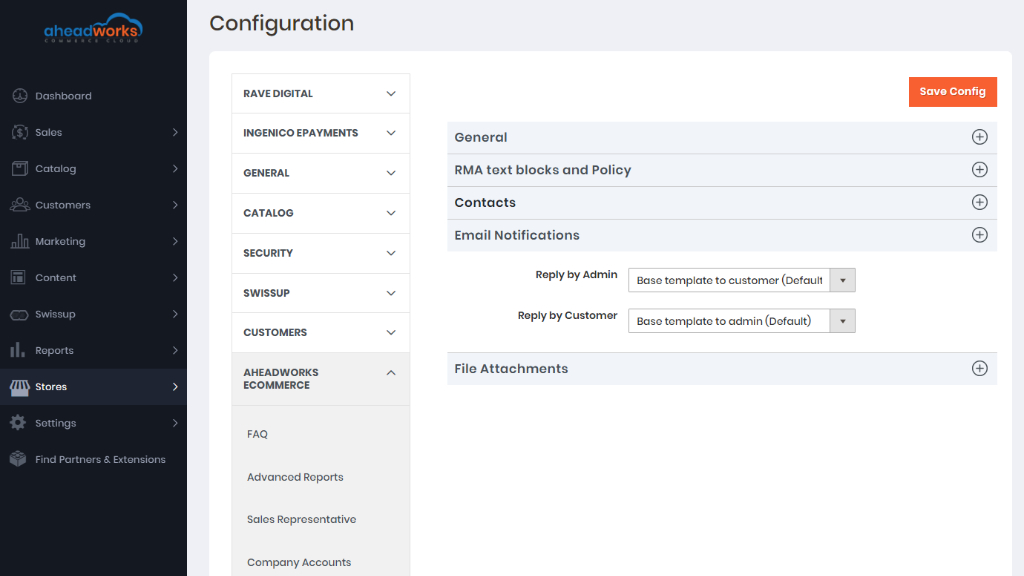
Email Notifications
This setting section defines email notification templates about the new reply by the store administrator to the customer's request (Reply by Admin) and the new reply by the customer to the request (Reply by Customer).
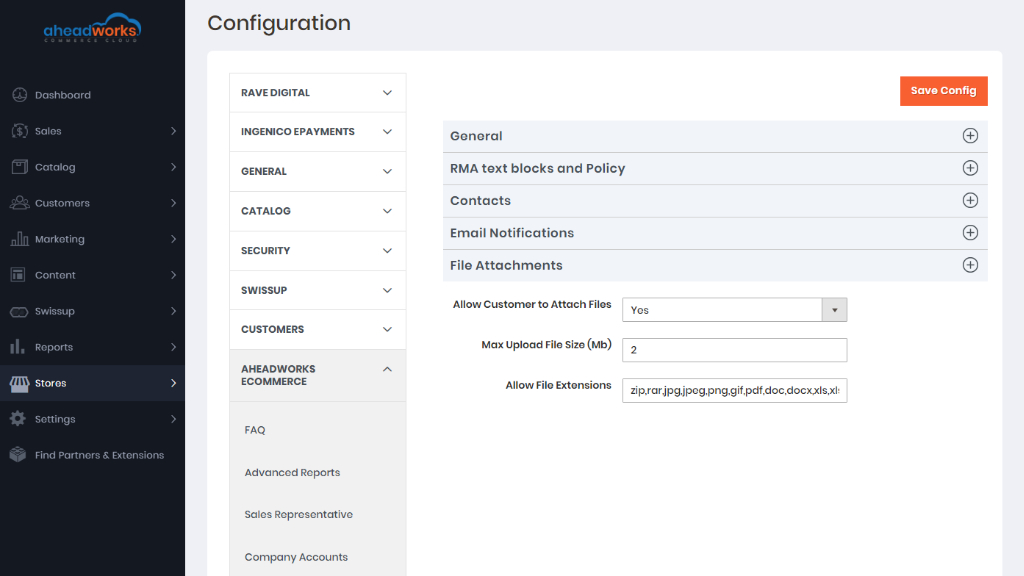
File Attachments
This setting section makes it possible for customers to attach files to their return requests. Here you can also specify the maximum size of the uploaded files in megabytes and available file modules.
How Do I Create Returns From the Backend?
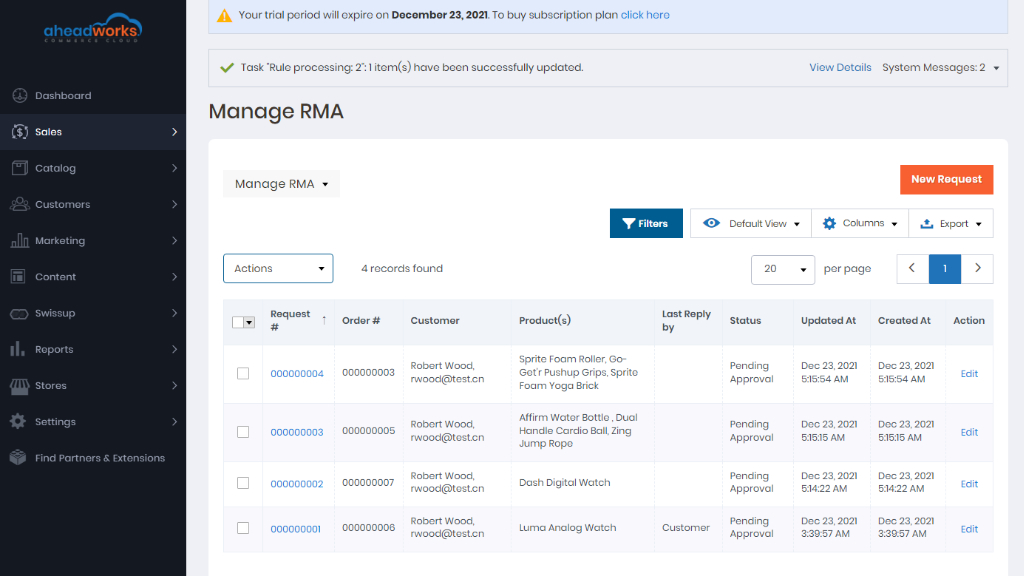
Manage RMA is the main section of the module. Here you can manage all the RMA requests submitted by you and your customers. With the 'Actions' box above the grid, you can change the request status individually or massively to:
- Approved;
- Canceled;
- Closed;
- Issue refund;
- Package received;
- Package sent;
- Pending approval.
Here, you can also export selected requests or the whole list in CSV/Excel. To create a new return request, click on the New Request button above the grid.
The 'New Request' page consists of several sections:
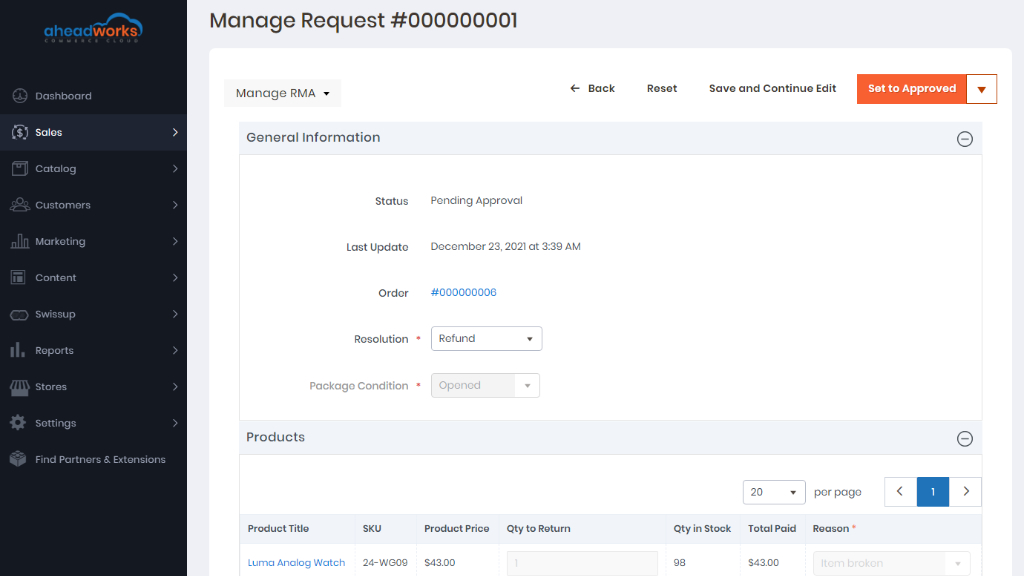
- General Information. With these options, you can select the order the request relates to. Next, you should select the Resolution you want to apply and Package condition reported by a customer if you use the above custom fields for your request forms.
- Products. Products included in the order. From the 'Products' grid, you can amend the number of returned items and the reason to send them back individually for each item. You can also remove certain products from the grid if you don't want them to be included in the request.
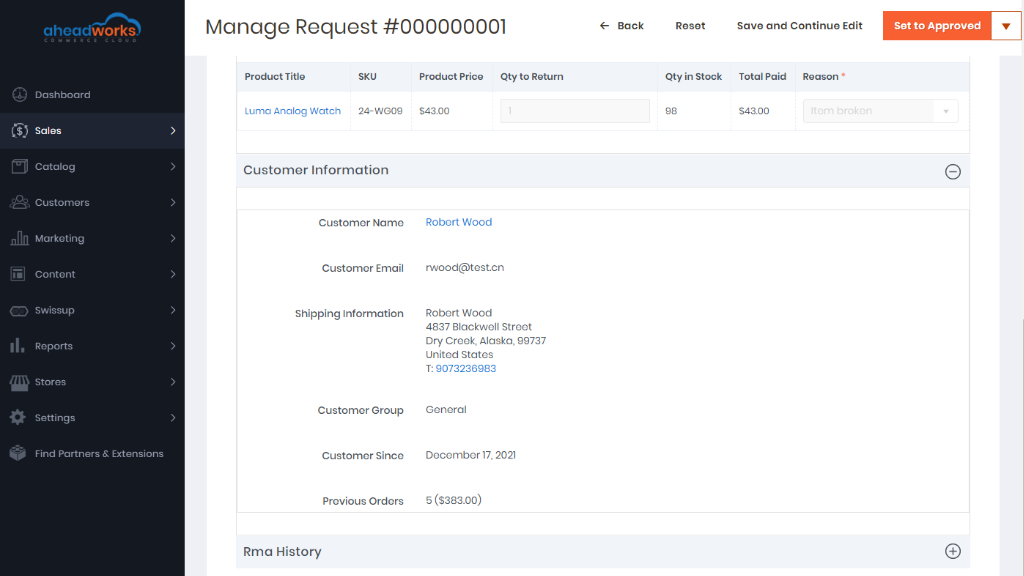
- Customer Information. The information about the customer is automatically taken from the order.
- RMA History. Here you can exchange messages with the customer and attach files if necessary.
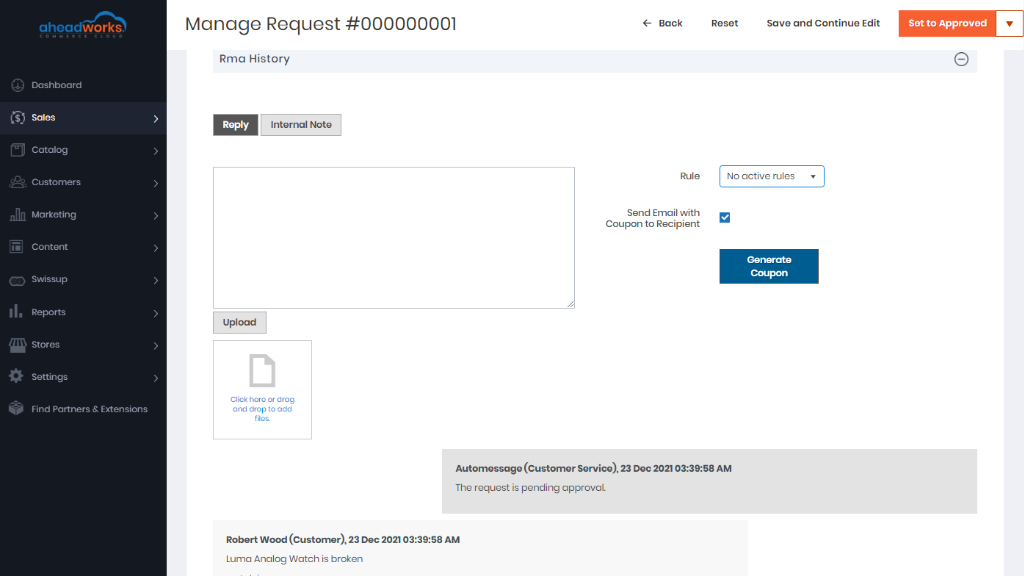
Messaging is possible in several ways.
- You can write an individual notification for the customer by specifying the message in the text area and clicking Reply above the area;
- You can leave an internal note for other admins. For this purpose, click Internal Note. The whole text area below will turn yellow to make you sure that the message is for internal use only;
- Finally, you can select a canned response to be sent to the customer in response to their particular actions.
As soon as the new RMA request is created, you can manage it the same way as the requests created by customers.
How Do I Manage RMA Requests?
Click the Request's id (all id's are presented as active links in the 'Request #' column) to proceed to the 'Manage Request' page. The page looks almost the same way as the 'New Request' page. The only difference is that the 'Status' and 'Last Update date' parameters are presented there.
So on this page, you can:
Approve the request by clicking Approve
Now the email notifying the customer about the new reply and request status update will be sent. Customers will now have the option to print shipping labels (to be included in the RMA package) and confirm that the package has been sent back to your store.
Print Label
Label printing is now available from the backend so that you can use the label for working with warehouses.
Confirm Package Receiving
After the request has been approved, and the customer has confirmed that the package had been sent back to your store, you will need to confirm the receipt. Do this by clicking Confirm Package Receiving.
Create a Replacement Order
As soon as the 'Package Received' status is applied, you can create a replacement order for the requests requiring a replacement.
Issue a Refund
For the requests requiring a refund, you can create a credit memo right from the 'Manage Request' page.
Close a Request
Finally, you can close the request as soon as the item is replaced or refunded.
Track returns at customer page in the backend
The module adds a corresponding tab to a customer page in the backend where you can refer to when it's needed to follow the RMA requests of a particular user.
Check Statuses
As it was previously mentioned, the RMA module comes to set up and ready for work right after the installation. If required, you can always adjust RMA request statuses and edit the notification emails.
There are 7 predefined RMA request statuses, each defining a particular stage of the RMA process.
|
Status |
Event |
|
Pending Approval |
Assigned to the new return request automatically |
|
Approved |
Assigned upon the request's approval |
|
Package Sent |
Assigned by the customer confirming package sending |
|
Package Received |
Assigned upon package receipt confirmation |
|
Issue Refund |
Assigned upon issuing a refund |
|
Closed |
Assigned upon closing a request either by you or the customer |
|
Canceled |
Assigned upon the request's cancellation |
If you need you can create a new unique status by clicking 'Add New Rule' at the Statuses an Email Templates page.
Use Templates
Depending on the request's type, it is also possible to send an email notification to the customer, store administrator, or both.
Along with defining templates for email notifications, you can edit the request thread's message to be displayed upon the request obtaining a particular status.
Custom Fields
As we already described in the Getting Around section, when submitting the request, you are suggested to fill in the 'Resolution', 'Package Condition', and 'Reason' sections to ask for the return.
All those are the predefined custom fields that come with the RMA module by default. They can be edited in the 'Custom Fields' section.
Along with editing custom fields, you can also create additional ones depending on the products or services you are offering.
To create a new custom field, click Add Custom Field:
- Define the name (for internal identification purposes) of the custom field and the field type: text field, text area, dropdown, multi-select;
- Decide if the custom field should refer to the RMA request on the whole or to the item(s) previously ordered;
- Set the return status upon which you and your customers can edit/view the field;
- If necessary, make the field required (customers will not be able to submit the request without filling this field);
- Add the custom field to the shipping label (this might help to identify the parcel);
- Choose the website the custom field should be displayed at.
- Adjust the field's frontend label (the title that will be displayed to customers).
- Add options (attribute values available for the 'Dropdown' and 'Multiselect' field types) if you want the customer to select from the predefined set of attributes.
Actions Tied to Custom Fields
If the type of the field is 'Dropdown' or 'Multiselect', each option of the field can be configured as follows:
- Is Default - the radio-box to identify the option to be shown in the field by default;
- Enabled - the check-box to define is the option is enabled within the field;
- Admin - the title of the option as it will appear on the Backend;
- Action - one of the two actions can be assigned to an option of the field: Create a Replacement Order or Create a Credit Memo;
- Statuses - the drop-box with order statuses;
- Default Store View - the name of the option on the store-front (view-dependent).
Configuring custom fields in the above way means that when the order is in one of the specified for the option statuses the Manage Request [Order Number] page on the Backend will feature either (or both) the Create a Replacement Order or Create a Credit Memo button. These can be used by the Admin to either create a replacement order in response to the request or initiate a refund.
From the 'Canned Responses' grid, you can create fast responses that can be used for status updates and other simple messages sent to customers. You can manage the existing responses either individually or massively and create new canned responses.
With the 'Select' box in the 'Action' column, you can edit or delete the selected responses, while the 'Actions' box above the grid makes it possible to change the status or delete the selected response(s).
To add a new canned response, click Add Canned Response above the grid. On the following page, you can enable the response, provide its title, select the appropriate store view and specify its content.
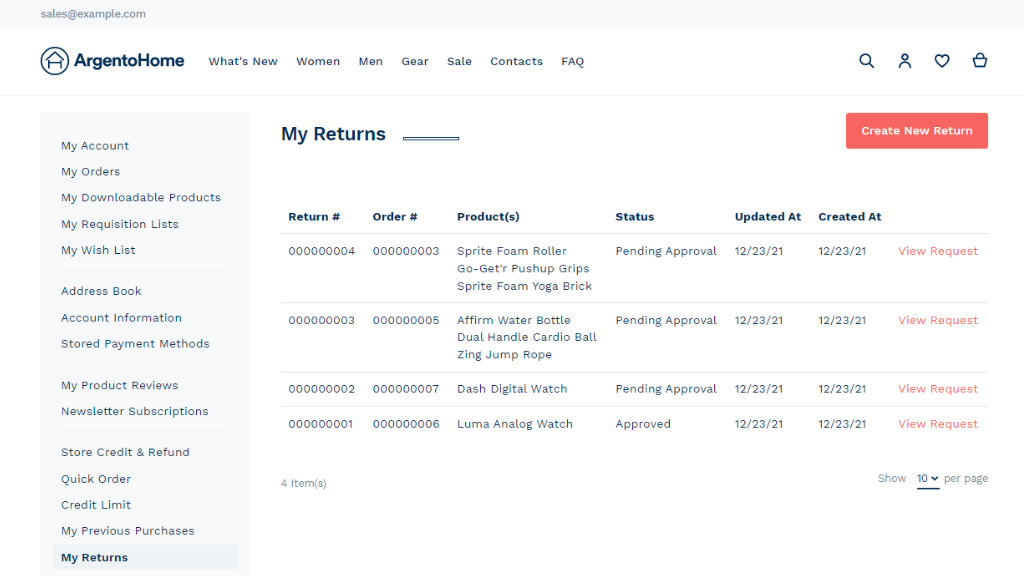
How Can Customers Create Return Requests?
To request the return from the 'My Returns' section click on the Create New Return button.
Next, select the item(s) you want to return and specify the item quantity (if you need to return several items). Choose the Resolution for the return and Package Condition. Those are the custom fields that come with the RMA module by default.
Once done, click on the Next button to proceed to the next step.
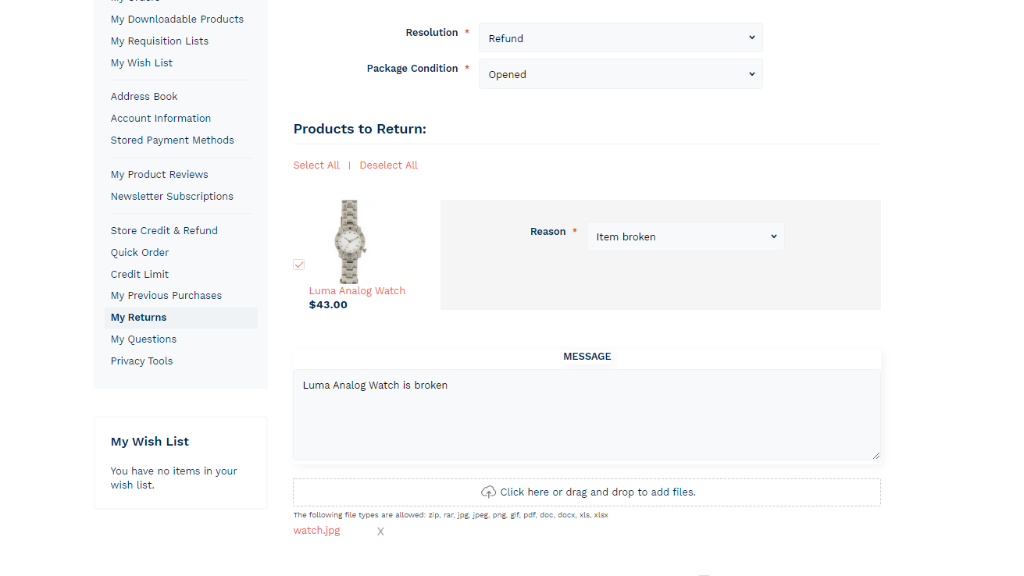
When the items are selected and custom fields are filled in, you can add a message to your request. The message will be emailed to an admin.
How Do I Improve Orders?
If you want to see all return requests created for a particular order, you can do this right from the order view page. The 'Returns' section enumerates all the created requests in the dedicated grid. In order to manage a certain request, you need to click the active link with the ID of the request in the 'Request #' column.
With New Return above the grid, you can create return requests on the spot.